Friday, June 8, 2018

Failure of Zimmer Cementless LPS Knee Replacement


Failure of Cementless Knee Replacement
This case concerns a 63 year old male with advanced osteoarthritis of his right knee. He underwent a right cementless, posterior stabilized total knee replacement using Zimmer Nexgen LPS flex porous femoral component with trabecular metal standard primary patella and posterior stabilized trabecular metal monoblock tibial component. The knee replacement surgery was performed 8 years ago. The components were chosen due to provide the highest level of durability given patient's young age and high activity level. Cementless technology has the potential to be more durable than cementless implantation of joint replacement. Here are the initial x-rays:

Weight bearing x-rays of right knee revealing advanced varus arthritis


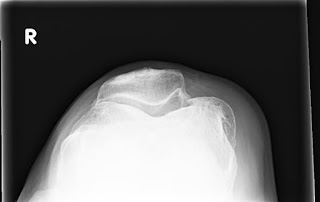
x-ray of patella
Here are the immediate postoperative x-rays. The patient recovered well and resumed a high activity lifestyle with aerobic exercise avoiding high-impact activities.
Immediate post-op x-rays showing successful implantation of cementless total knee replacement

The patient returned 8 years later with recent onset of severe pain and difficulty moving his knee. Repeat x-rays were obtained:
Current x-rays show no obvious signs of failure
MRI with metal artifact reduction sequences was obtained as well with no abnormalities noted.

He was taken to the operating room for arthroscopic evaluation and possible revision. The patella was found to be damaged upon arthroscopic evaluation so a decision was made to open up the knee and revise the components. Here are the arthroscopic pictures:
Arthroscopic pictures of patella showing damage to the polyethylene surface

The components were all found to be well fixated to the bone. The femoral component was retained. Here pictures of the explanted components.


Explanted materials from revision knee replacement. The tibial post was broken off and there was severe damage to the polyethylene patella component articular surface

Here are the post-operative x-rays from the revision showing a new patella component and stemmed LCCK tibial component. Note the metallic debris from cutting through the trabecular metal patella and tibial posts. Also note the screw down tibial polyethylene component which is a feature of the LCCK system. Hybrid fixation of the tibia was used with cemented metaphysis and cementless diaphysis. The splined cementless stem engages the cortices of the bone in the midshaft region.

Post-op knee x-ray

Post-op knee x-ray

Post-op knee x-ray
Conclusion:
It seems that the polyethylene tibial post broke off due to cyclic loading caused by daily activities and low impact exercise activities that the patient participated in. This likely resulted in excessive wearing of the patella component as well with near wear through of the metal backed patella component.
There is much room for improvement in designing knee implants for the active adult <60 years of age. Present technology has a significant risk failure in < 10 years as seen in this case.

Case presented with permission from the patient.

Thursday, March 8, 2018

Revision hip for periprosthetic fracture with Zimmer Biomet Arcos Modular Hip System

This is a case of an elderly gentleman who sustained a fall from standing height. He fractured his left hip This is classified as a displaced femoral neck fracture. See x-ray below:

He underwent a bipolar hemiarthroplasty using a cementless Zimmer Biomet M/L Taper Hip Prosthesis. Here is a picture of the prosthesis. I prefer the Alloclassic for this type of case.

Postoperative x-ray below:

Subsequently, a few months later, he fell again and fractured his femur. This is called a periprosthetic fracture. This type of fracture is difficult to treat and requires extensive surgery. The hip stem was destabilized by the fracture. See x-rays:


We used the Arcos modular revision system and selected a very long, fully porous coated stem to achieve distal fixation past the fractured area. This is what the Arcos system looks like.

Here are the intra-operative x-rays showing provisional fixation with cables and the trial components:
Here are the post-operative x-rays:

You will note that the stem was so long it could not fit on one x-ray image. You can see that the stem is made of 3 pieces. The head, the proximal portion called the body, and the distal portion called the stem. These are all selected and fitted individually to make the final construct. 4 cables were used to fixate the fractures and stabilize the stem as well.


Friday, March 31, 2017

Hip Air Arthrogram and Steroid Injection

I perform steroid injections for my patients to treat hip pain. When the pain is coming from inside the hip joint,such as in cases of osteoarthritis, avascular necrosis, hip impingement, or labral tear, an intra-articular injection is indicated. These injections are performed with fluoroscopic guidance (using a real-time x-ray machine). Usually intra-articular contrast is used to verify position of the needle.
I prefer to inject air rather than commercial contrast material since I believe that air is safer. Other doctors ask me how I can be sure that the injection is going in the right place with just using air, they ask how can you see the air. Here is an example of a recent patient with an air arthrogram of the hip:
Air Arthrogram Right Hip Joint Injection
Right Hip Air Arthrogram
As can be seen in the above images, the right side shows air injected into the inferior region of the femoral neck. The air then naturally travels to the inferior region of the hip joint and encircles the hip joint in the area just outside the labrum This is seen as a lighter density coming from the inferior hip and heading in a direction up and lateral, approximately perpendicular to the femoral neck.
In this case the patient was highly satisfied with the steroid injection and had relief of hip pain.

Thursday, February 16, 2017

Failed fixation of hip fracture with subsequent conversion to hemiarthroplasty

Hip Nail Failure Case

This case involves an elderly female who fell at home and fractured her hip. She was evaluated with x-rays and found to have an intertrochanteric hip fracture. Here are the initial x-rays:


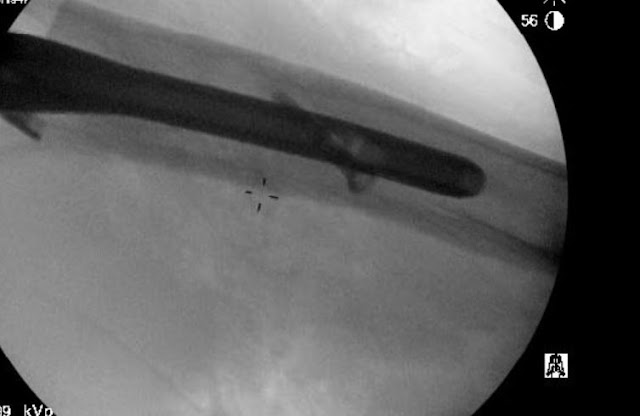
I consider this fracture pattern to be unstable due to the reverse obliquity of the fracture line. The patient was optimized and underwent intramedullary fixation with a cephalomedullary device (Zimmer Natural Nail). Here are the intra-operative fluoroscopy images.


As seen above, the cephalomedullary nail is in excellent position and the fracture is well reduced and aligned. Here are x-rays taken at routine follow up evaluations:


Here are x-rays at a later date:


You can see evidence of screw migration and fixation failure. At this point the patient had severe symptoms. A CT of the hip was obtained. Here are the coronal and sagittal reconstructions:


As seen, the hip screw has penetrated the femoral head and failed. There is a nonunion of the fracture as well. This patient required additional surgical treatment. Removal of the hip nail and placement of a partial hip replacement or hemiarthroplasty was recommended. Revision fixation was not considered advisable due to damage to the head and high risk of failure.

Here are the final x-rays showing the long stemmed partial hip replacement. The Zimmer/Biomet Arcos Modular Femoral Revision system was used.


The patient recovered well from the surgery and has regained functional abilities. I have noticed a higher incidence of these kinds of failures over the last few years. I suspect it is related to an aging population with more severe osteoporosis. Nevertheless, I think there is room for improvement in implant design to improve the success rate.

Wednesday, June 22, 2016

Periprostheric femur fracture - Revision and ORIF

This is a complex hip fracture case. An elderly lady had a hip replacement a few years ago. Here are her post-op x-rays.
She did well after the surgery until she fell a few years later.
This is what the x-rays look like.


As you can see in the x-rays, there is a fracture of the femur around the hip implant. This is called a periprosthetic femur fracture. There are multiple fracture fragments around the proximal femur. The hip stem seems to have come out of the femur through the fracture and is no longer attached to the femur.
The best treatment for this type of problem is to remove the femoral component of the hip replacement and place a new, longer one and to fix the fracture with cables. This is called revision hip arthroplasty(replacement) with open reduction and internal fixation(ORIF).
The Biomet Arcos Modular Femoral Revision System was used for this surgery. The Arcos is assembled with different sized parts inside the femur during the surgery. It allows the surgeon to customize the implant for the specific surgical application.
Biomet Arcos(c)
Here is a x-ray showing successful revision of the femoral implant and cerclage cable fixation of the femur fracture.


Wednesday, February 19, 2014

What type of hip replacement implants do I use?

I get asked this question all the time by my patients. "What type of hip replacement do you use?"

This is an important consideration. There are many companies that make implants for hip replacement surgery and each company has multiple product lines. It is alot like automobiles. You could get a Ford or a Honda (the company) and within each company you could get different models (like the Ford Taurus or the Honda Civic).

Each company has a historical track record and each model (as long as its been out for a few years) will have outcomes and performance data that could be used to make a decision on which one to choose.

Other considerations are patient specific. For example a young active patient might do better with an implant designed to last a long time while an older disabled patient might need an implant that provides maximum stability. Different implant designs may be optimally suited to different bone types and anatomical variations.

Just like there are Ford guys and Chevy guys, you will find surgeons who are Zimmer guys/girls, Stryker guys/girls, etc. There is a comfort level with the implants and instrumentation that is necessary in order to achieve optimal results that are consistent. It is not advisable to constantly change implant types.

The bottom line is that most surgeons use one implant design for the majority of patients and have others that they use as back-ups for atypical cases.

For the majority of my hip replacements I use the Zimmer Alloclassic® or Zimmer® M/L Taper Hip Stem. These stems both have excellent track records with almost 100% success rate in research studies. For information on the stems click on the links:
Zimmer Alloclassic®
 Zimmer® M/L Taper Hip Stem
For the socket or cup, I usually use the Zimmer Continuum® Acetabular System. The cup is made with trabecular metal which achieves an excellent press-fit into the socket bone and has immediate stability. It also has an excellent track record.For more information, click on the links.
 Zimmer Continuum® Acetabular System
The last part of a hip replacement is the bearing surface. The bearing surface is referring to what parts are gliding on one another when the joint moves. There are a few options such as metal on poly, metal on metal, ceramic on poly, and ceramic on ceramic. The picture above shows a pink ceramic ball which is the Biolox® Delta Ceramic Femoral Head. This is a very strong, hard, and smooth design that achieves optimal longevity and durability.

Take a look at a golf pro try to break one with a driver. The driver gets dented and the head is fine!

I use the ceramic head with a Longevity® Highly Crosslinked Polyethylene Liner. Click on the link below for more details.
Longevity® Highly Crosslinked Polyethylene Liner

 This combination is selected to achieve the best results for my patients as far as longevity, durability, and stability. I could go on and on about this and this may be too much information for most patients. If you have any questions please ask me.

Wednesday, October 23, 2013

Direct Anterior Hip Replacement - Dr. Nasar

I recently performed a direct anterior hip replacement. This is a new approach to hip replacement that preserves the muscles. It usually allows very rapid return of function and patients do not have to worry about dislocation. They can bend over right after surgery without a problem.
Anatomy of the Hip Joint
By Smith & Nephew (Smith & Nephew) [FAL], via Wikimedia Commons

The direct anterior approach uses a small (4") incision in front of the hip. This approach is known for quicker recovery.